This tutorial will tell you What is 3dcart? 3dcart review, and a complete guide to create an online store using 3dcart.
If you own a business in 2020, it’s imperative that you create and maintain an online presence in the form of your own website. Building a website for your business to sell on used to be a difficult task, with a large investment of time, money and skill required to make it happen. But, in this modern era of the internet, eCommerce platforms have simplified and streamlined the process to make it easy for anyone to build and manage their own online store.
Today, we’ll be diving into one such eCommerce platform, 3dcart(20% Discounted Link), and instructing you on how to build your own online store from scratch using the platform.
What is 3dcart?
3dcart is one of the best e-commerce sites which helps to create an online store. It is Founded in 1997, 3dcart is an all-in-one eCommerce solution that packs a website builder, shopping cart software, marketing tools, and much more into one SaaS platform. 3dcart allows a business to create an online store and manage their own eCommerce website to sell products online. The platform is secure and scalable, making it a powerful choice for any sized business, from startup to enterprise.
What features does 3dcart have?
As a full-featured eCommerce platform, 3dcart has a lot of built-in functionality to offer. The following features are some of the most useful and significant included in the service:
Shopping Cart Software
- 3dcart’s software allows you to view, edit and save customer’s carts.
- Enable either a one-page or 3-page checkout on your online store according to your business preferences.
- Enable customer accounts and/or guest checkout so customers can shop how they want on your store.
- Utilize abandoned cart saver features to recover lost sales and bring back potential customers who may have lost interest along the way.
Marketing Tools
- Create content for marketing using 3dcart’s built-in blogging platform.
- Add coupons and discounts to your store to encourage customers to buy.
- Enable an affiliate program on your online store and reward brand loyalty.
- Work with an impressive built-in suite of SEO tools to reach the top ranking spot on search engine result pages.
- Integrate with all of your social media accounts and start selling on Facebook and Instagram.
- Send out email newsletters to potential and existing customers to promote your business.
Product & Order Management
- Easily import and export all of your products and categories in bulk using CSV files.
- Upload an unlimited number of products, categories, and images to your online store.
- Add advanced product options to any of your products to sell multiple versions of the same product within the same product page.
- Get new order notifications every time an order is placed on your store.
- Start dropshipping with built-in integration with the most popular dropshipping suppliers, like AliExpress.
Payment Processing
- Integrate with your choice of over 200 ways to accept payments, including digital wallets and cryptocurrency.
- Increase average order value by enabling a “Buy Now, Pay Later” feature for customers.
- Take orders physically with the built-in POS module, or integrate with Square POS.
- Work with international and high-risk payment providers to accept more payments.
Shipping Features
- Give customers shipping rates calculated in real-time so they can easily decide on the shipping method they want.
- Print shipping labels to fulfill your orders directly from your Online Store Manager.
- Enable Multiple Ship-To checkout so that customers can split their orders among multiple recipients.
3dcart Plans, Pricing & Discount
3dcart offers several pricing plans that fit the needs of different businesses, so take the time to determine which plan has the right features and price point for you. 3dart plans start at $9.99 from dropshipping to enterprise level.
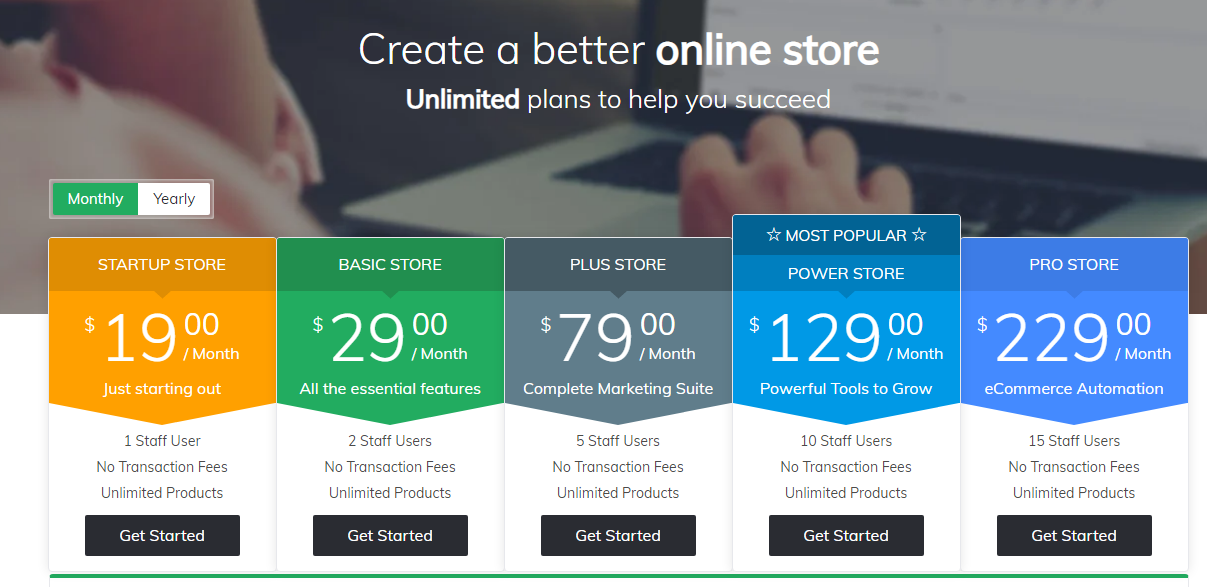
If you wish, you can also sign up for a free 15-day trial to test out the software before committing to a purchase. Trial stores can’t take any orders, so the free trial is meant for merchants to have 2 weeks to learn and understand the software. There’s no credit card information required to sign up for the trial, so you won’t have to worry about being charged once it ends.
3dCart Discount Coupon
Vwant Special Offer: Our readers get a special 20% Discount on all 3dCart plans for the first month through This special discounted page. You can also check our 3dCart discount coupon page for the latest offers.
How to Build an Online Store with 3dcart
3dcart touts itself as an easy-to-use eCommerce platform that gives you all the features you need to build an online store that does everything your business requires. Let’s go through every necessary step you need to take to start your own online store with 3dcart.
1. How to Create Your 3dcart Account
Before you can start building your online store, you’ll need to sign up for a 3dcart account.
After signing up, you’ll receive a Welcome email that contains all of the login credentials you need to log into your new site, along with your website’s URL. Navigate to the site URL and add “/admin/login.asp” to the end of the URL to log in with those credentials.
Next, after you accept the terms and conditions, you’ll be prompted to enter the email address you’d like to be used with your account. Change your password to a new secure password, because the password given to you is generic and should be changed for security reasons.
2. How to Add Your Store Information
Now it’s time to start building your online store by entering your store’s information
Step 1: Add Your Store Name, Slogan & Logo
Navigate to Settings > General > Store Settings.

Under Store Information, enter your store name and slogan. By default, your store name is “Sample Store,” so change it to the name you’d like your store to have. A slogan is not required.

Next, to add your store logo, click on the Browse button to upload your logo files in the File Manager.

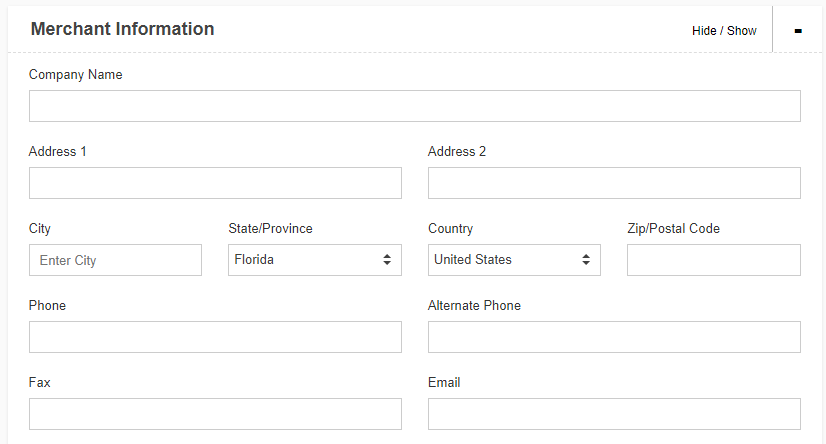
Step 2: Add Your Company Information
On the same Store Settings page, enter your basic company contact information (such as address, phone number, invoice information, etc.) under the “Merchant Information” section.
3. How to Select Your Theme & Customize Your Site
Your store will have a default theme applied to it once you sign up. If you’d like a different look, you can change that to a different theme.
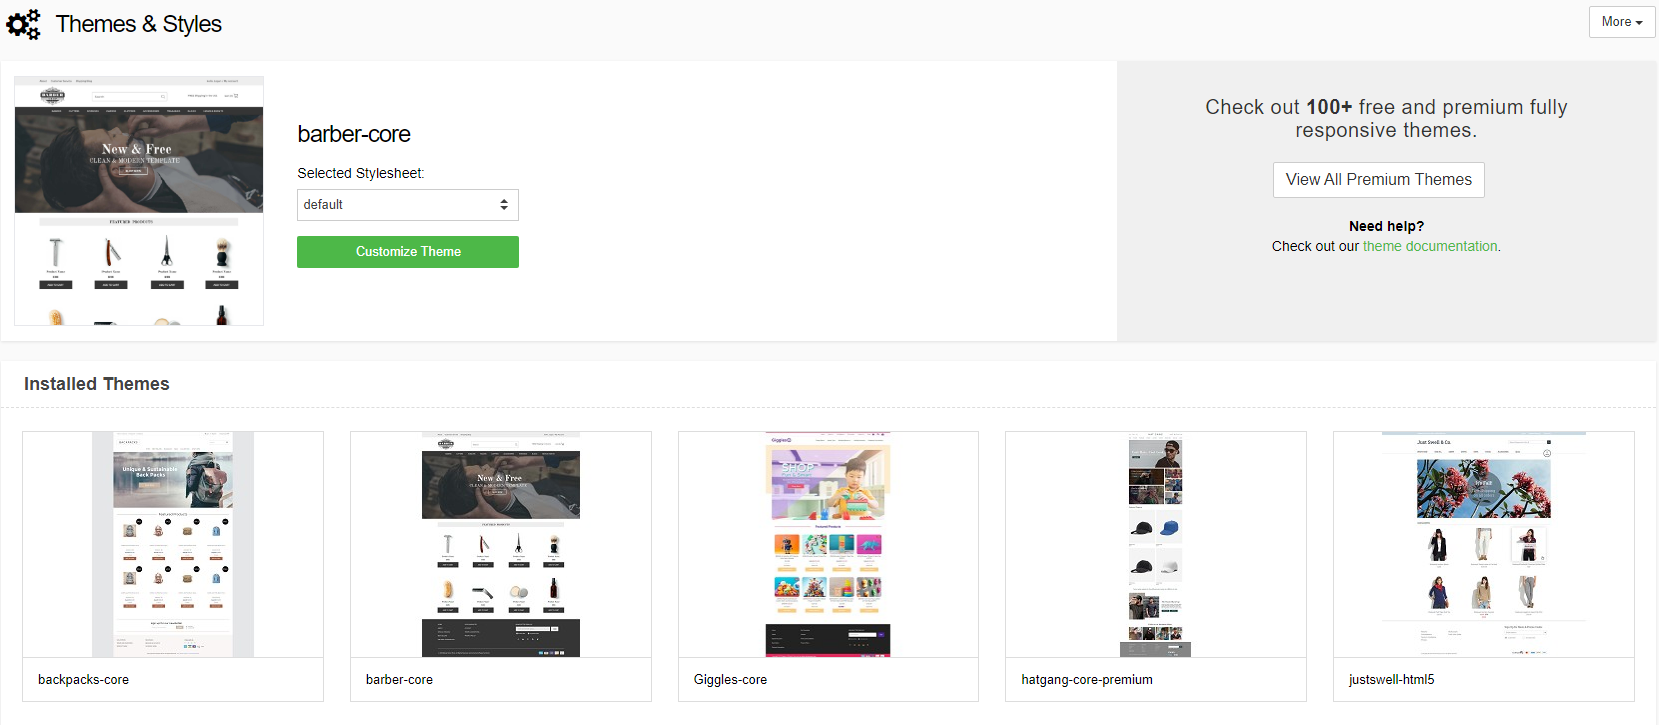
Step 1: Choose Your Theme
To choose a new theme, navigate to Settings > Design > Themes & Styles.

On this page, you’ll find all of the free themes included in your 3dcart account that you can freely choose from and customize. There’s a variety of theme layouts and color schemes available, so take your time working with different themes until you find the one that best fits your business.

Once you find a theme you like, click on the image and download the theme to begin installing it.

Feel free to install multiple themes to compare how each of them look on your site. All of the themes you’ve installed will appear in the Installed Themes Section of your Themes & Styles page.
Step 2: Customize Your Theme
Once you’ve chosen a theme that you’re happy with, you can make further customizations to the theme’s color scheme to get a more unique look. Simply click “Customize Theme” underneath the theme that you’ve installed, and you will be taken to the Theme Editor.
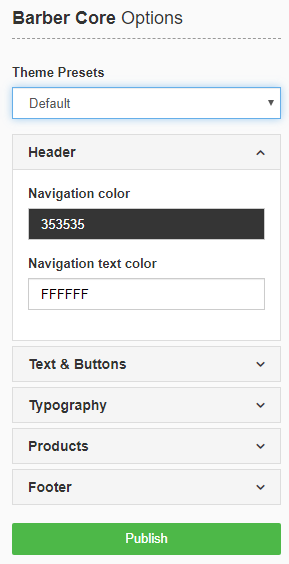
From here, you’ll be given a few options. First, you can select from one of the theme’s presets, which include several colors that have been pre-determined to work well with each other, giving your store a unique look instantly. But, if you’d like to get more granular, you can go into each section of the theme and edit specific colors for certain elements, such as navigation and buttons.
Step 3: Edit the Homepage Carousel
The main centerpiece of your online store’s homepage is, typically, the slideshow carousel. To edit this carousel, navigate to your online store’s homepage and click on the 3dcart Tools button at the top right corner of your site. Then, click Edit Carousel.
Note: This button will only appear if you are logged into your Online Store Manager.

Once you’ve reached the Homepage Carousel page, you can edit your carousel settings. You can choose to either enable or hide the carousel, specify the delay between slides in milliseconds, choose your desired transition animation, and browse to upload the files you want to appear in the carousel. At this point, you can also specify what URL that your carousel image links to. If you’re linking to a URL on your site, all you need to do is paste the slug after your store’s domain name.
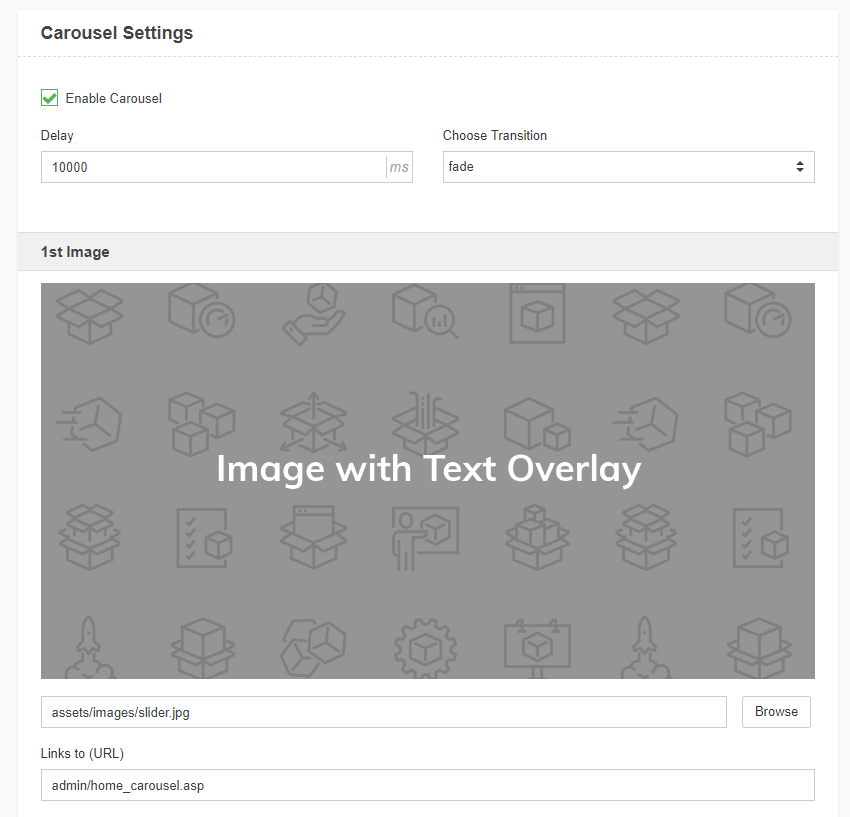
Tip: When picking the images that you’d like to use for your carousel, be sure to choose images that are large and share the same dimensions.
4. How to Add Your Products
Now that your site is looking how you want it, it’s time to replace the default sample products with your real products. There’s two ways to add products to your online store: manually adding them and importing them via CSV.
4.1 How to Manually Add Your Products
First, navigate to Products > Product List to see the products that you already have.
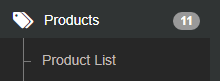
You can either edit the existing products or delete them and start from scratch. To add a new product, click the Add a Product button at the top right of your products list.

After you click this button, you’ll be taken to the Add a New Product page. Here, you’ll enter any necessary product information, including name, SKU, description, product type, and categories.
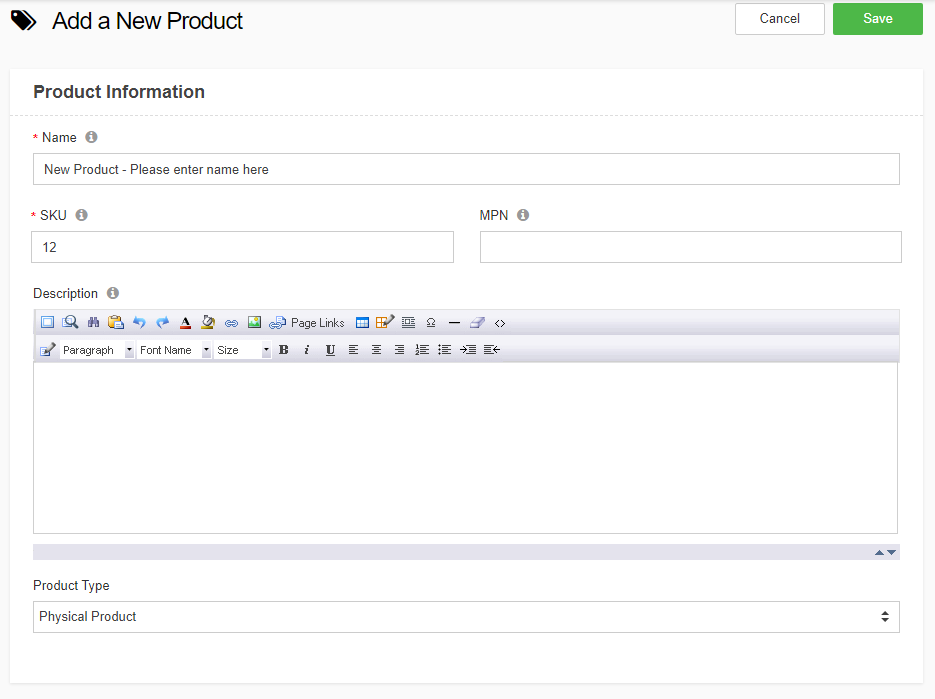
If you don’t have any categories, you can add new categories by entering the category name and where it should be placed. You can also make subcategories that further refine more broad categories, basically acting as child categories.
Next, add any product images by dragging and dropping the files you want. Then, add pricing information, such as price, and retail price. You’ll also want to specify any inventory settings, including inventory control, stock level, and whether you want customers to be able to purchase that product if it’s out of stock.

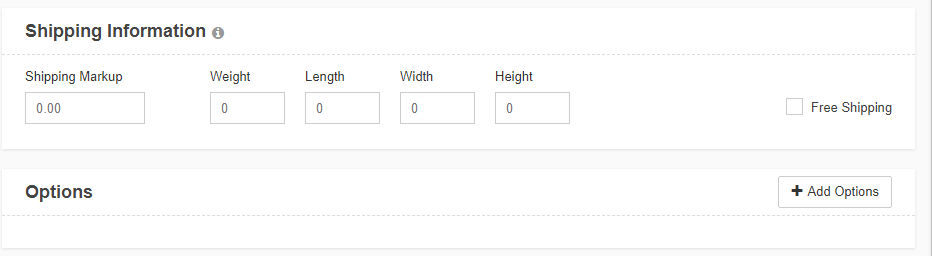
After entering this information, you’ll then need to enter the product’s specific shipping information. This includes any shipping markup you want to add, and the product’s dimensions (height, weight, width, length). Also, if applicable, add selectable product options; for example, if your shirt comes in multiple colors.
Once you click save, more product option tabs will appear in the product page. From here, you can make further specifications like more images.
4.2 How to Add Products with CSV Import
If you have a large product catalog, it’s a good idea to import that information via a CSV file to avoid entering each product in one-by-one. Now that you’ve entered a few products manually, with as many facets added as possible, you can use that information as a template.
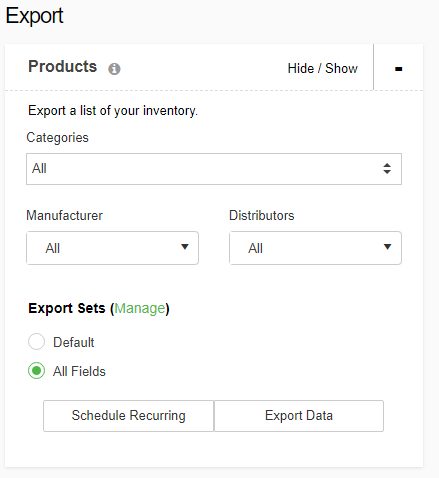
On the same Products List page as before, click the Export/Import button. Then, expand “Products” under the Export column, select all fields, and click Export Data.
Once your CSV file is finished, download the completed file that your store generated. In this file, each column will include a different facet of the product. Enter in all of the information for each of your products into this file for everything you haven’t already entered into your online store, making sure to pay attention to the facet columns.
After you’ve finished entering all of this information, you can use the File Manager to upload all of your prodict images, ensuring that the paths matched what you entered into the CSV file.
Under the Import section of the Export/Import page, expand “Products” and click browse to select the CSV file you filled out. Then, click “Import Data.”

At this point, you’ll be redirected to a page that gives you several options, but for the purposes of this guide, select “Insert Only” so that your store can create the rest of your products.
5. How to Add Your Payment Method
Now that you have your products, you’ll need to set up a way for customers to actually purchase them. To add your desired payment methods, navigate to Settings > Payment, and then click “Select Payment Methods.”

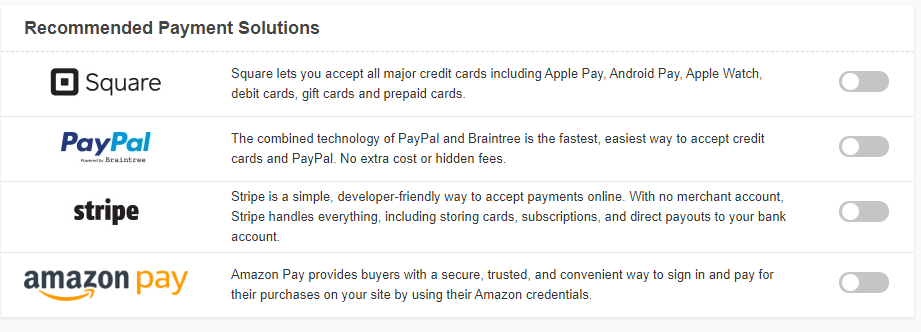
On this page, you’ll find a few recommended payment methods at the top, which you can connect to your store by turning them on with the toggle button and clicking their respective connect buttons. This will tie your account to your chosen payment provider.
If you’d like to just use PayPal Express, simply toggle that method on and add your PayPal email address into the field.

However, if you need to add a specific payment gateway that’s different from what’s shown, click “Add New” at the top right of the screen and select your desired payment method. You’ll also be able to select your country, state, minimum order amount, maximum order amount, and customer group. Finally, you can enter the required credentials for your account to finalize setup.

You also have the ability to add offline payment methods, like “No Payment Necessary” or “Money Order.”
6. How to Set Up Your Shipping Configurations
The next step is setting up all of your shipping settings and methods to enable real-time shipping calculation for your customers.
Step 1: Set Up Your Shipping Settings
To get started, navigate to Settings > Shipping. From here, go to the Shipping Settings section.

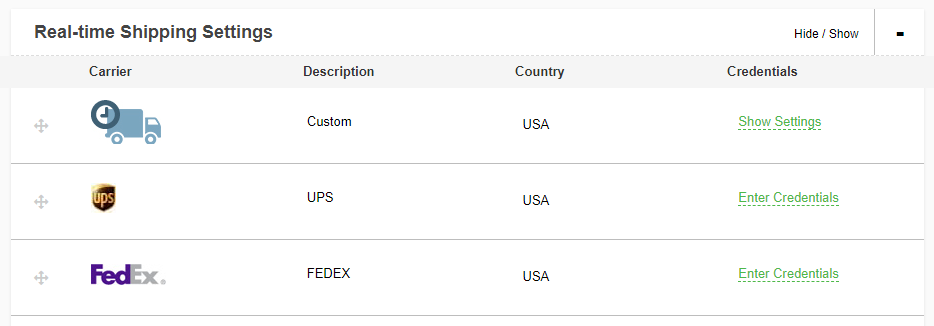
After you click “Edit Settings,” you’ll be able to set up your real time shipping under “Real-time Shipping Settings.” From here, connect your 3dcart store with your respective carrier service, like UPS or FedEx. Then, enter the credentials for that carrier, or click register if you haven’t made an account yet.
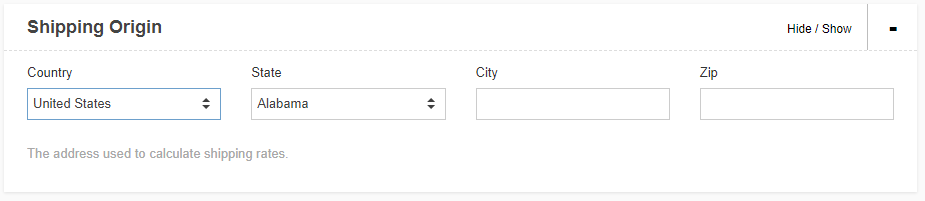
Next, navigate to “Shipping Origin” at the top of the Shipping Settings page. Enter where your products will be delivered from so that the carrier you’ve selected can properly calculate rates.
Step 2: Set Up Your Shipping Methods
To set up your shipping methods, go back to Settings > Shipping. Underneath Shipping Methods, click on “Select Methods” to go to the Shipping Methods page.

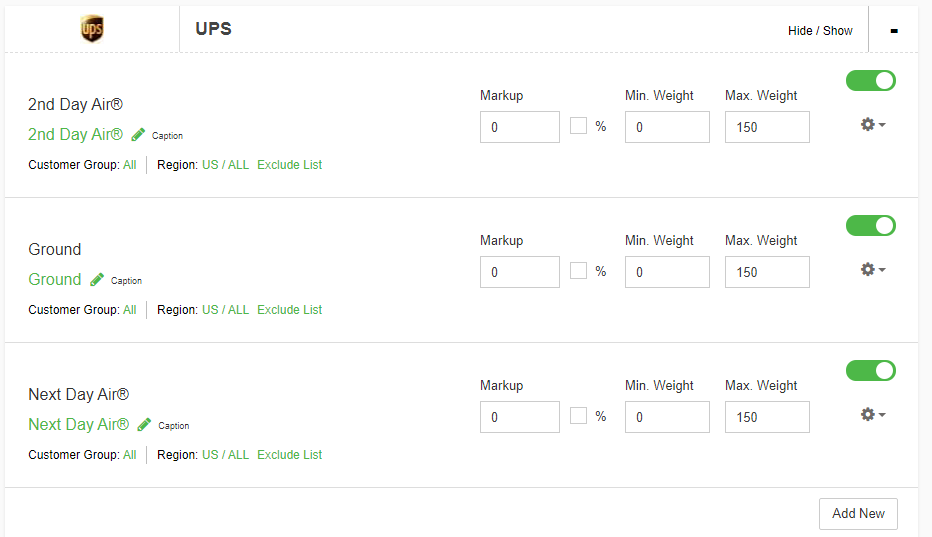
From this page, you can add flat shipping rates or edit your free shipping settings. You can also integrate your selected Shipping Method, like UPS, and configure it as needed.
If you’d prefer to not use one of the offered methods, you can instead create custom shipping methods that are offline and apart from the shipping carriers. These methods ae calculated based on ranges that you create based on quantity, value, weight, or zip code that the order is being shipped to.
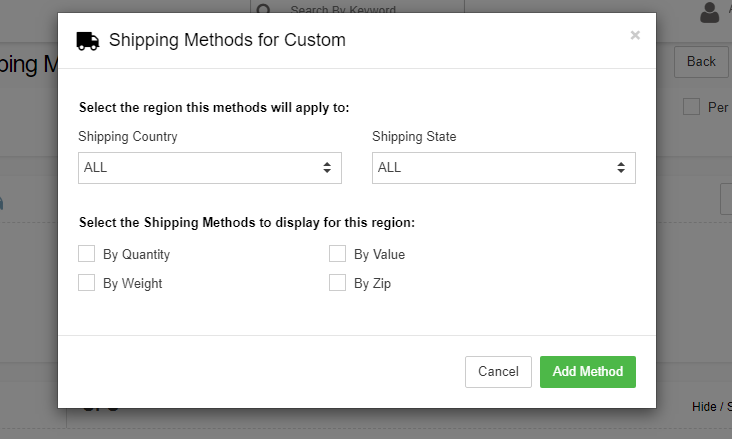
To add the range, click “Add Method” once you’ve finished setting up the Custom Shipping Method. Then, click on the action wheel under the method you’ve just created. Click on “Edit Ranges” and add your ranges on the Quantity Ranges page.

7. How to View Your Orders
Everything that you need to start taking orders on your online store is set up! So, to test everything out and make sure it works, place a test order as any customer normally would on your store.
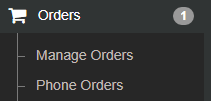
Once the order is placed, you, as the merchant, will get a notification on it. To view your orders, navigate to Orders > Manage Orders.
On the order page, you can click on the order you’ve just received and look through the details so you can fulfill it.
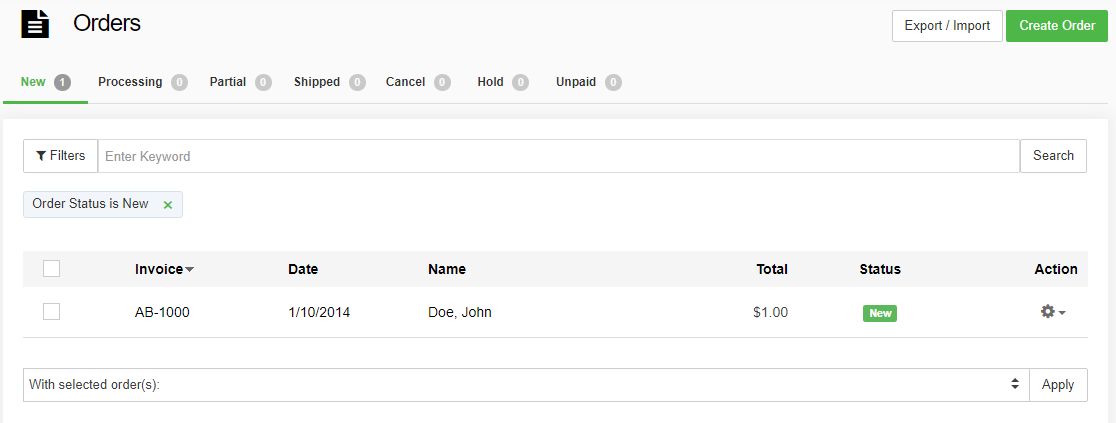
Click on the order and, under the Shipping section, click “Fulfill.” Here, you can enter the ship date and tracking number and select to notify the customer. At this point, the order has now been move dto the Shipped status.

After your order has been placed, your Online Store Manager dashboard will show your store’s order and revenue information about an hour later. This also give syou the option to look at your data historically.
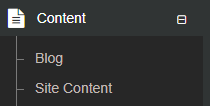
8. How to Set Up Content Pages
Although your site is now fully functional, you may want to further edit content pages on your online store. Let’s go through how to edit your home page, terms & conditions, top menu links, and footer extra pages. You’ll find all of these options when navigating to Content > Site Content.
Step 1: Edit Your Homepage
On the Site Content page, click the edit button underneath the Home Page section. Then, click “Launch Page Editor” to gain access to the Page Editor with Drag ‘n Drop HTML Builder. At this point, you’ll see a preview version of your site that you can add and edit content blocks onto. With content blocks, you can add in whatever elements you’d like to see appear on your homepage. When you’re done, be sure to click save to make this new content live.

Note: Not every theme currently supports the Page Editor’s Drag ‘n Drop HTML Builder.
Step 2: Edit your Terms & Conditions
Going back to the Site Content page, this time click the edit button underneath the Terms and Conditions section. This will take you to the Terms and Conditions page content, where you can add content via the WYSIWYG (what you see is what you get) editor. After you’ve entered your content, you can click the Preview button o see what it looks like, and then click save to make the edits go live.

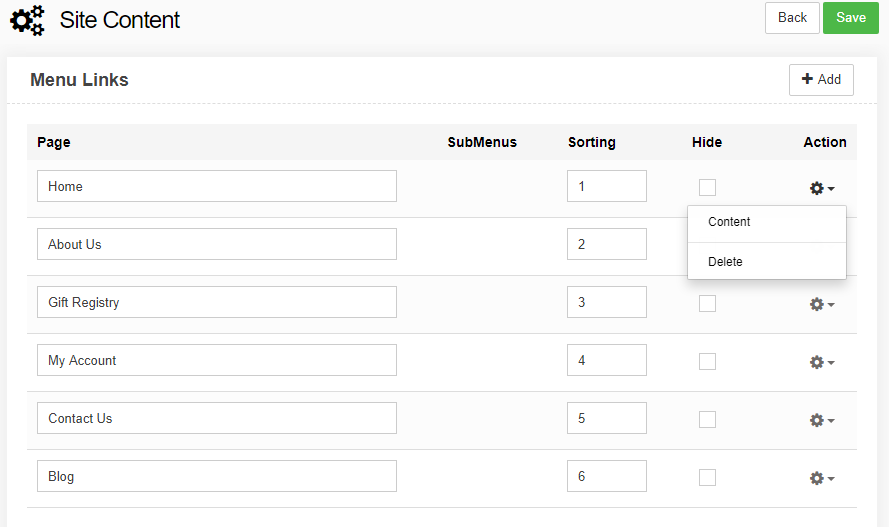
Step 3: Edit Your Top Menu Links
This time, click the edit button underneath the Top Menu Links section of the Site Content page. This will take you to the Menu Links page, where you can see all of the content pages that are currently in your top menu links. From here, you can change their order in the menu, hide certain pages, or edit the content of the pages by clicking the action wheel and clicking “Content.” This will bring up a content editor similar to the Terms and Conditions page. Click save once you’re ready for the content to go live.
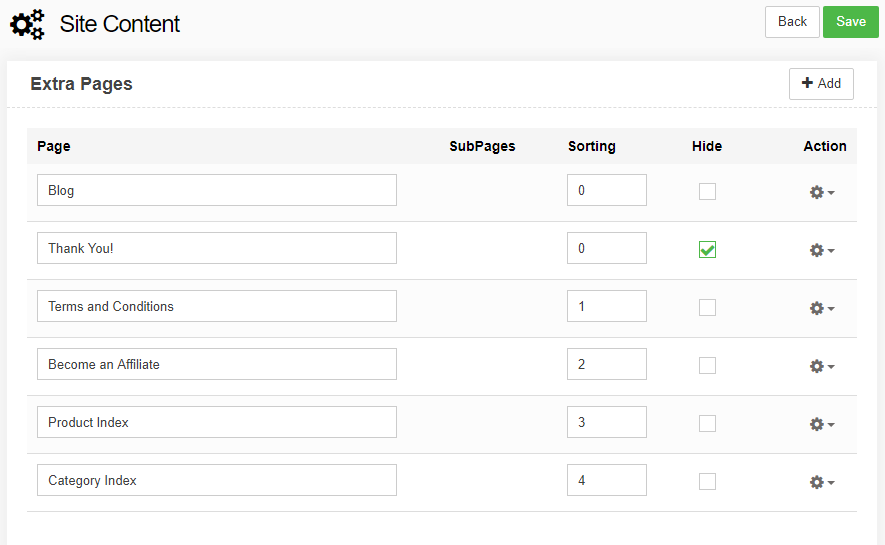
Step 4: Edit Your Footer Extra Pages
Back on the Site Content page, click the edit button underneath the Footer Extra Pages section. This will show you your extra content pages that show up in your site’s footer links. Editing these pages acts exactly the same as the Top Menu Links pages.
Conclusion
Now that you know how to build your online store with 3dcart(20% Discounted Link), you can make the decision for yourself whether or not you want to utilize the platform for your own business. With all of the built-in functionality that 3dcart has to offer, and all of the steps clearly lined out in this guide, it’ll be easy for you to get started on your own site using the platform.
I hope now you might know what is 3dcart? and how to create an online store with 3dcart. If you like it, please share it and follow BlogVwant on Facebook and Twitter for more tips.
What is 3dcart & Building a 3dcart Online Store – FAQ
Does 3dcart offer a free trial?
Yes, you can sign up for a 15-day free trial to test out the software before committing to a paid plan.
How much does 3dcart cost?
3dcart offers a variety of pricing plans with different features and staff users available. Plans can cost as little as $9/month for a Dropshipping plan to Enterprise level plans.
Are 3dcart stores secure?
All 3dcart stores are securely hosted, PCI certified, and are supported by a 99.9% uptime guarantee. Every plan comes with a 256Bit SSL certificate to ensure that your site is secured, and your entire site is backed up daily in the case that you need a restore at any time.
Is 3dcart the best eCommerce platform for SEO?
SEO, or search engine optimization, is one of 3dcart’s strengths due to the full suite of tools available. Merchants can edit meta titles and descriptions, customize image alt tags, set up canonical URLs, create 301 redirects and much more.